自制 C-41 和 RA-4 化学品
以下信息是从网上检索到的,尤其是 William Laut 于 1999 年 8 月 27 日在 rec.photo.darkroom 上发表的一篇精彩文章。
原文:
————————————————– ————————————————– —
在这篇文章中,我记录了 ng 上要求的 C-41 和 RA-4 的几个公式。我两个都用过,它们给了我一直很好的结果。
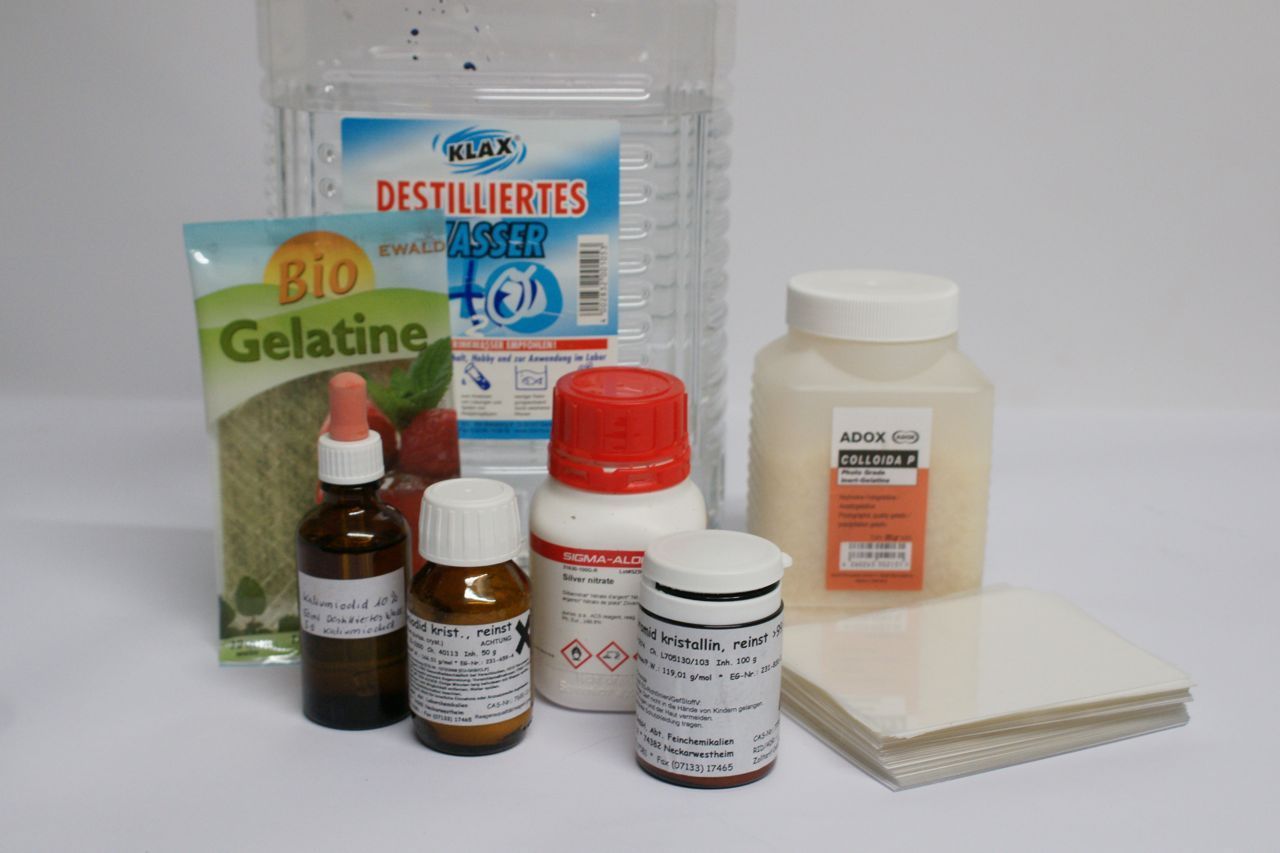
让我们从所涉及的化学品的摘要开始,以及它们目前在摄影师处方集和艺术化学品中的定价。还有其他供应商,如果您货比三家,您可能会发现更好的价格。如果没有给出价格,则意味着该公司不出售它。数量被任意选择,作为经济和价格之间的折衷,随着数量的增加,更好的节省。
|
化学成分 |
|||
|
– – – 价钱 – – – |
|||
| 化学名称 | (订货尺寸) | 处方集 | 工艺品 |
| CD-3 | (100克) | — | 17.00 美元 |
| CD-4 | (100克) | 27.42 美元 | 22.00 |
| 碳酸钾,Anh。 | (5 磅) | 19.95 | 16.50 |
| 亚硫酸钠,Anh。 | (5 磅) | 16.95 | 16.50 |
| 溴化钾,Anh。 | (1 磅) | 11.25 | 11.30 |
| 硫酸羟胺 | (100克) | 16.25 | — |
| 冰醋酸 | (1 加仑) | 28.63 | — |
| 硫酸,48% | (1 分) | 8.95 | — |
| 硫代硫酸铵,60% | (1 加仑) | 15.00 | 14.00 |
| 乙二胺四乙酸铁铵 | (1 磅) | 32.00 | 23.15* |
| 碘化钾 | (100克) | 19.95 | 22.00 |
| 甲醛,37% | ??? | — | — |
| 氯化钠 | (1 磅) | 4.00 | — |
| 三乙醇胺 (TEA) | (1 夸脱) | 18.95 | 15.00 |
| Tinopal SFP | (100克) | — | — |
| 小计 | 219.80 美元 | 157.45 美元 | |
* Artcraft Chemicals 以 47% 的溶液形式销售其液态形式的 EDTA 铁。
此处列出的价格来自它们的 1 夸脱尺寸,并经过调整以反映相当于 454 克干化学品。
硫酸不用于任何配方中,但包含在化学品清单中,因为它是一种简单而有效的清洁方法,可以清洁储存瓶中积聚的污泥。
在您所在的地区可能很难获得甲醛。我最近看到 Unicolor 的替代稳定剂由六胺组成,一升浓缩物的价格为 10.00 美元。
Tinopal SFP 是一种可用于 RA-4 的荧光增白剂,但我目前正在努力寻找它的来源。到目前为止,我还不需要使用 Fujicolor 纸。
M&C。实验室设备/供应品
您将需要各种尺寸的刻度来测量液体、一个 1.5 毫升的滴管(来自 PF)以便于测量三乙醇胺,以及一个称量干化学品的秤。秤的范围可以从便宜的到价值 3,000 美元以上的药房秤和极其昂贵的精密实验室仪器。
目前我拥有两个秤,一个 Acculab V-333 和一个 DRX-2 处方天平。我使用哪一种取决于称量化学品所需的数量与精度。
Acculab V-333 是一种受欢迎的、价格适中的秤。它可以测量高达 300g 的实时数字显示,精度为 +/- 0.1g。我更喜欢在 0.1g 的精度不会显着影响公式或测量超过 10.0g 的数量时使用它。V-333 的售价约为 140 美元(另一种型号,V-200,Artcraft 的售价约为 129 美元)。
当需要更高的精度或当我需要准备少于一升的化学药品时,我会使用从我的药剂师朋友那里购买的传统“处方天平”。它是由新泽西州克利夫顿的 Torsion Balance Co. 制造的 A 级扭力天平,是他们的型号 DRX-2。
它的容量为 120 克,精度为 +/- 0.001 克,图例以 0.005 克为增量标记。早在 1995 年,这些设备以 1,100 美元(不含配重)的价格全新出售,尽管您可以以 200 到 500 美元的价格购买使用良好的设备。为这种类型的天平设置的重量可以从 20 美元到 150 美元不等。
您还需要购买“粉纸”。它们由植物羊皮纸制成,尺寸从 2″x3″ 到 4.5″x6.5″。它们以 1,000 张一盒的价格出售,价格为 12 至 20 美元。它们用于保护天平的秤盘并消除来自天平上称量过的微量化学品的污染。它们使用一次,然后丢弃。
您可能还希望订购一些不锈钢“平衡勺”。这些用于方便地从瓶子中取出化学品并将它们放在秤上,特别是当您必须一次将几粒化学品轻敲到称重盘上时进行精确测量。
您还应该购买一个小研钵和研杵,用于将某些化学品(例如某些品牌的溴化钾)研磨成小尺寸以进行精确称重。
粉末纸、平衡勺和研钵和研杵可以通过当地的化学品供应商或友好的药房订购。您也可以从 Apothecary Products, Inc. 订购它们。他们的电话号码是 (800) 328-2742。
我建议您将 CD-3 和 CD-4 存放在密封的棕色玻璃罐中,以最大限度地延长它们的存储寿命。
最后,您应该将酸和碱储存在单独的柜子中。
不要将酸和氢氧化物并排存放在密闭柜中!!
RA-4 彩色打印配方
这个公式的开发者首先由罗伯特·查普曼博士在 PT 上发表,并由 Ron Speirs 和 Bill Cox 提供给我(谢谢你们)。我稍微修改了它以包含荧光增白剂 Tinopal SFP 和可选的氢氧化钾,以便在室温下使用。
请注意,由于亚硫酸盐的数量必然有限,因此 RA-4 显影剂的保质期不长。我在混合后使用它长达 48 小时,但我不会比这更久。
虽然此显影液旨在在 95F 下使用,但如果您将显影时间延长至约 3 分钟,或添加约 5.0 克氢氧化钾,则可在室温下使用。对于那些想要“AT”套件的人,您必须尝试找到适合自己的时间。
由于我更喜欢一次性处理,因此我仍在与此开发人员进行试验,以了解如何稀释并仍然获得良好的结果,目的是使其使用成本尽可能低。
Blix I 从 Beseler RA-4AT 套件逆向工程,然后将其稀释以进行经济的一次性处理,每 8×10 需要 60 毫升。如果您想使用此 Blix 公式进行托盘处理,您可能需要集中精力。此外,请注意,最初的 Beseler 试剂盒在其 Blix 中包含氨,以抵消因停浴残留酸化 Blix 可能导致的青色白细胞染色。我没有通过添加不必要的化学物质使配方复杂化,而是省略了氨,而是在停止和 blix 之间添加冲洗液。
|
RA-4 开发人员 |
|
| 水(室温) | 750.0ml |
| 三乙醇胺 | 6.0ml |
| 亚硫酸钠,Anh。 | 1.0g |
| CD-3 | 5.0g |
| 碳酸钾 | 40.0g |
| 氢氧化钾* | 5.0g |
| 氯化钠 | 0.5g |
| Tinopal SFP** | 0.5g |
| 做水 | 1.0L |
* 如果您计划在室温下使用此显影剂而不需要额外的显影时间,则仅添加氢氧化物。您可能还会看到颜色向青色偏移,您必须在过滤器中进行校正。
** 在此开发人员中,Tinopal SFP 的使用是可选的。我建议您先尝试使用不含增白剂的显影剂,看看您是否真的需要使用您选择的纸张。
|
RA-4 停止浴 |
|
| 冰醋酸 | 10.0ml |
| 做水 | 1.0L |
|
RA-4 布利克斯 |
|
| 水(室温) | 750.0ml |
| 硫代硫酸铵,60% | 80.0ml |
| 乙二胺四乙酸铁铵 | 10.0g* |
| 做水 | 1.0L |
* 如果您使用的是 Artcraft 的 47% EDTA 铁,此步骤使用 22.0 毫升。
准备笔记
我建议使用来自摄影师处方集的 1.5 毫升滴管来测量三乙醇胺,因为它是一种非常粘稠的糖浆状液体。
测量 TEA 时,您将进行四次 1.5 毫升的测量。两次测量之间允许 TEA 在滴管中积聚,然后将其“喷出”到刻度盘中,以便将所有被测液体正确放入溶液中。进行四次测量后,冲洗刻度盘中的滴管(内部和外部),以便将所有 TEA 放入溶液中。
注意:TEA 是一种强碱,会对您的皮肤造成化学灼伤!
小心处理,以免弄到皮肤上。
在 RA-4 显影剂中,亚硫酸钠的作用是抑制过度的染料形成,而氯化钠是抑制剂。由于涉及的数量很少,如果您使用 Acculab 量表直接测量这些,您可能难以获得一批开发人员与另一批开发人员的一致性,因为其精度仅为 +/- 0.1g,并且(在这种情况下)可能会引入10% 或更多的差异。如果您无法使用扭力天平来称量亚硫酸盐和氯化物,并且您正在经历显影剂性能的批次变化,您可能希望按如下方式制备百分比溶液:
亚硫酸盐溶液
| 亚硫酸钠,Anh。 | 10.0g |
| 做水 | 500.0ml |
氯化物溶液
| 氯化钠 | 10.0g |
| 做水 | 500.0ml |
用 50.0ml 的亚硫酸盐溶液和 25.0ml 的氯化物溶液代替显影剂配方中的干化学品对应物。
Blix 不会像您通常从商业套件中看到的那样不透明。这是因为它已被稀释以进行一次性处理。
|
处理时间表(95F/35C) |
|
| 预冲洗 | 0:30 |
| 开发商 | 1:00* |
| 停止沐浴 | 0:30 |
| 冲洗 | 0:30 |
| 布利克斯 | 2:00 |
| 冲洗 | 2:00 (4x 0:30) |
* 可能需要根据每张纸调整显影时间以获得理想的 D-max。例如,Fuji Super FA5“G”面一分钟就足够了,而Fuji Super FA5“L”面则是1:10更好。
C-41 彩色胶片配方
这是 C-41 公式。它由 Zone V 出版(不要与 Fred Picker 的 Zone VI 混淆),并由 Ron Speirs 提供给我(感谢 Ron)。
IMO,它比商业包装的 C-41 显影剂“更热”,因此可能是推动彩色负片的理想候选者,尤其是在高于 100F 的温度下(尽管不推荐与 100F 的任何差异,并且应该在应用于重要工作之前经过实验证明)。
CD-3显影剂中的亚硫酸盐是用来防止过多的染料形成的,我在CD-4上也看到了同样的现象,所以也许可以用这种显影剂来推动色片,同时稍微增加亚硫酸盐内容以防止高光被遮挡(该开发人员很容易做到)。在这方面,添加额外的亚硫酸盐可以比作在黑白胶片上使用极端补偿儿茶酚显影剂的效果 – 您可以获得完全显影的阴影,而不会遮挡高光。这仍然是理论上的,有时我希望有时间用 100 英尺长的胶卷、Macbeth Colorbrator 和我的透射密度计来详细了解细节。
在明亮的阳光下拍摄的电影可能需要稍微拉一下以防止高光被遮挡。这是您必须尝试的东西,以便找到在明亮阳光下拍摄胶片的理想曝光指数和显影时间。
当用于显影名义上已超出制造商额定速度 1/3 档过度曝光的胶片时,色彩充满活力且具有全对比度。
我还没有尝试通过实验稀释这个公式,看看我可以将化学物质拉伸到什么程度,并且仍然可以通过一次性处理获得出色的结果。我将在今年秋天晚些时候这样做,并将结果报告给当时的 ng。
|
C-41开发人员 |
|
| 水(室温) | 800.0ml |
| Potassium Carbonate | 32.0g |
| Sodium Sulfite | 3.5g |
| Potassium Bromide | 1.5g |
| Hydroxylamine Sulfate | 2.0g |
| CD-4 | 5.0g |
| Water to make | 1.0L |
|
C-41 Stop Bath |
|
| Glacial Acetic Acid | 10.0ml |
| Water to make | 1.0L |
|
C-41 Blix |
|
| Water (Room Temp) | 500.0ml |
| Ammonium Thiosulfate, 60% | 200.0ml |
| Ferric Ammonium EDTA | 25.0g* |
| Sodium Sulfite | 15.0g |
| Potassium Iodide | 1.0g |
| Acetic Acid, 28% | 10.0ml |
| Water to make | 1.0L |
* If you are using Artcraft’s 47% Iron EDTA, use 54.0ml for this step.
|
C-41 Stabilizer |
|
| Water (Room Temp) | 800.0ml |
| Formaldehyde, 37% | 3.0ml |
| Photoflo 200 | 0.8ml |
| Water to make | 1.0L |
|
Processing Schedule (at 100F/38C) |
|
| Dry Warmup | 5:00* |
| Developer | 3:15 |
| Stop Bath | 0:45 |
| Rinse | 0:30 |
| Blix | 6:30 |
| Wash | 4:00 (8x 0:30) |
| Stabilizer | 1:00 |
* For the “Dry Warmup,” put the tank containing the film into a tempering bath, and allow it to warm up for five minutes before commencing with the development. Please note that you do NOT put tempering water into the tank, as this will induce color shifts.
Preparation Notes
NOTA BENE: Hydroxylamine Sulfate is a corrosive, hazardous substance! It will cause chemicals burns and can stain when alkaline. Be careful not to get any on your skin. Read the MSDS carefully for handling instructions.
Alternate Bleach & Fixer
If you wish, you can also use a separate, more economical Ferricyanide Bleach and Fixer. They cannot be used together as a Blix, since Ferricyanide and Thiosulfate are unstable together and neutralize one another.
|
Ron’s Bleach formula |
|
| Water | 750.0ml |
| Potassium Ferricyanide | 80.0g |
| Potassium Bromide | 20.0g |
| Water to make | 1.0L |
|
The Fixer is made using Kodak Flexicolor Fixer |
|
| Kodak Flexicolor Fixer | 244.0ml |
| Water to make | 1.0L |
If you wish to compound your own fixer from bulk, Dr. Robert Chapman published the following formula:
|
Dr. Robert Chapman fixer formula |
|
| Water | 750.0ml |
| Ammonium Thiosulfate, 60% | 160.0ml |
| EDTA | 1.0g |
| Sodium Bisulfite | 12.0g |
| Sodium Hydroxide | 2.5g |
| Water to make | 1.0L |
|
The process schedule becomes: |
|
| Developer/Stop | <see above> |
| Rinse | 1:00 (2x 0:30) |
| Bleach | 2:30 |
| Rinse | 1:00 (2x 0:30) |
| Fixer | 2:30 |
| Wash | 4:00 (8x 0:30) |
The Bleach and Fixer can be reused until the the bleach/fixer times extends beyond the times listed above.
Bottle Cleaning
In my experience, both C-41 and RA-4 have a tendency to build up a sludge along the sides of the storage bottles. I’ve found the easiest way to clean out this sludge is to put 750ml of hot water into the storage bottle, and then add about 10-15ml of 48% Sulfuric Acid to the water. Tightly screw on the cap and then gently shake the bottle. The acid will quickly dissolve the sludge.
Dump the water and then thoroughly rinse out the bottle before adding fresh solution to it.
N.B.: The Acid will generate heat as it mixes with the water, so don’t use excessively hot water to begin with.
Cost Analysis
Finally, I’m including a gross cost analysis of preparing C-41 and RA-4 from bulk chemicals. Easily, the most expensive chemicals in either process are the dveloping agents (CD-3 and CD-4) and the Ferric Ammonium EDTA.
The difference in price for the Bleach (Iron EDTA) between Artcraft and PF amounts to about two cents per gram, and for the CD-4 it’s about 2.5 cents per gram. At five grams per litre, the cost difference is only $0.13 per litre on who’s CD-4 you use. However, for the Bleach the difference is significant enough IMO that I’ve provided a side-by-side comparison for you to decide whether you want to measure it on a scale or in graduate. 🙂
Not including the cost of the scale(s) or other sundry lab equipment, the chemical-only cost per litre is:
| Formulary | Artcraft | |
| RA-4 Developer | $1.24 | $1.24 |
| Stop Bath | 0.08 | 0.08 |
| Blix | 1.00 | 0.81 |
| RA-4 Total | $2.33 | $2.13 |
| Formulary | Artcraft | |
| C-41 Developer | $1.72 | $1.72 |
| Stop Bath | 0.08 | 0.08 |
| Blix | 2.81 | 2.32 |
| C-41 Total | $4.61 | $4.12 |
At 61ml per 8×10, this will process 16 8x10s for $0.15/$0.13 (PF vs. AC’s Iron EDTA) per 8×10.
Using the Jobo 256x six-reel tank (850ml), the cost per 35mm roll is $0.6531/$0.5837. If you use the Jobo 252x tank and process two rolls at the same time, using 250ml of chemistry (and diluted to 270ml to correctly fill the tank), then one litre will develop eight rolls of 35mm film at a cost of $0.5763/$0.5150 per roll.
For medium-format users, the cost (using a Jobo 252x tank) is $0.70 per roll of 120, and $1.10 per roll of 220.
Large-format (4×5) using 2509N reels varies in cost, from $0.185 per sheet (six sheets in a 252x tank) to $0.229 per sheet (18 sheets in a 2583 tank).
This variance is due to chemistry volume differences in the 252x vs. 2538.
As for the RA-4 cost of $0.15 per 8×10, well, you can compare _that_ for yourself to what your local pro lab would charge you for printing an 8×10.
The cost savings of mixing from bulk versus mixing from a commercial kit diminishes as you buy larger kits, but does not disappear altogether until you buy a 125-litre kit.
Obviously, I cannot place a dollar amount on the value of your own time, so I cannot factor that into the cost analysis and thus that’ll have to be your own call. In preparing these formulas, without pushing myself I find that it takes about 45 minutes to prepare the RA-4 and about an hour to prepare the C-41. These times include all prep work and post-mixing cleanup.
Closing Thoughts
For myself, the principal advantages of mixing color chemistry from bulk chemicals are as follows:
1) Batch-to-batch consistency. When I first started in RA-4, I was dismayed to see how often my filterpacks would vary from one kit to the next. It was simply unpredictable, and in retrospect I believe I was seeing the same thing that Curt Miller saw in dealing with prepackaged PMK – the alkali was being neutralized by CO2 that was permeating the plastic bottle.
By contrast, in the last two weeks I’ve probably gone through about ten litres of RA-4 using the enclosed formula, and there has been _no_ variance whatsoever. No wasted test prints, no readjustments to the trial filterpack, nothing but predictable, satisfying, 8×10 and 16×20 color printing.
2) Long shelf life. The chemicals, in their dry form, will last nearly indefinitely on the shelf. For example, my supply of CD-4 is about 1.5 years old, and this week I used some to make 250ml of C-41 to process a couple rolls of Fuji Reala with excellent, predictable results.
Compare that sort of lifespan to a partially-used RA-4 or C-41 liquid concentrate.
IMO, if you don’t do color work regularly, then this benefit alone could justify the added work of mixing the chemistry from bulk chemicals.
3) Easy ratioing. Since the formulas are metric, it’s easy to divide them to make as much or as little as is needed without any waste.
4) Low cost. The greatly reduced expense makes color film developing and printing _fun_ again, without the angst of seeing another buck or two of chemistry wasted on yet another blown print. This is especially merciful to those who are new to color printing, as it allows them to learn how to successfully print without the grief of going through possibly hundreds of dollars’ worth of kits, or of trying to squeeze the life out of every last drop of developer, and possibly introducing color shifts in the process.
On the negative side, the only disadvantages I could identify is the inconvenience of having to learn how to weigh dry chemicals on a scale, and the initial high investment cost (around US$400). However, in that initial investment you not only buy all the required lab gear, but also enough chemicals to make twenty litres of RA-4 -and- twenty litres of C-41.
You could spend the same amount of money buying twenty one-litre kits of RA-4, and have nothing left over to process your negatives, so the high initial investment is not as bad as it first seems.
Anyway, those are the formulas. Enjoy them, and as I come up with refinements I’ll post them to the ng. If anyone comes up with improvements, please post them as well.
Regards,
Bill Laut
——————————————————————————————————-
Back to top
Home-made C-41 & RA-4 Chemicals
In this post I’m documenting a couple of formulas for C-41 and RA-4 that have been requested on the ng. I’ve used both, and they have given me consistently good results.
Let’s begin with a summary of the chemicals involved, and their current pricing from both Photographer’s Formulary and Artcraft Chemicals. There are other vendors out there, and you likely will find even better pricing if you shop around. Where a price is not given, it means that company doesn’t sell it. Quantites were chosen arbitrarily as a compromise between economy and price, with better savings coming in progressively larger quantities.
|
C h e m i c a l C o m p o n e n t s |
|||
|
—— Price —— |
|||
| Chemical Name | (order size) | Formulary | Artcraft |
| CD-3 | (100g) | — | $17.00 |
| CD-4 | (100g) | $27.42 | 22.00 |
| Potassium Carbonate, Anh. | (5 lb) | 19.95 | 16.50 |
| Sodium Sulfite, Anh. | (5 lb) | 16.95 | 16.50 |
| Potassium Bromide, Anh. | (1 lb) | 11.25 | 11.30 |
| Hydroxylamine Sulfate | (100g) | 16.25 | — |
| Glacial Acetic Acid | (1 gal) | 28.63 | — |
| Sulfuric Acid, 48% | (1 pt) | 8.95 | — |
| Ammonium Thiosulfate, 60% | (1 gal) | 15.00 | 14.00 |
| Ferric Ammonium EDTA | (1 lb) | 32.00 | 23.15* |
| Potassium Iodide | (100g) | 19.95 | 22.00 |
| Formaldehyde, 37% | ??? | — | — |
| Sodium Chloride | (1 lb) | 4.00 | — |
| Triethanolamine (TEA) | (1 qt) | 18.95 | 15.00 |
| Tinopal SFP | (100g) | — | — |
| Sub-total | $219.80 | $157.45 | |
* Artcraft Chemicals sells its Iron EDTA in liquid form as a 47% solution.
The price listed here is derived from their 1 quart size and adjusted to reflect the equivalent of 454 grams of dry chemical.
The Sulfuric Acid is not used in any formula, but is included in the chemical list because it is an easy and effective means of cleaning the sludge that will accumulate in your storage bottles.
Formaldehyde may be difficult to obtain in your area. I’ve recently seen a replacement stabilizer from Unicolor consisting of Hexamine costing $10.00 for a one litre concentrate.
Tinopal SFP is an optical brightening agent that can be used in RA-4, but I’m currently trying to track down a source for it. To date I’ve not needed it with Fujicolor paper.
M i s c. L a b E q u i p m e n t / S u p p l i e s
You will require various sizes of graduates for measuring the liquids, a 1.5ml eyedropper (from PF) for conveniently measuring the Triethanolamine, and a scale for weighing the dry chemicals. Scales can range from the inexpensive up to pharmacy scales costing $3,000+ and precision laboratory instruments that are exceeding expensive.
At present I own two scales, an Acculab V-333 and a DRX-2 Prescription Balance. Which one I use depends on the quantity vs. precision required for the chemical being weighed.
The Acculab V-333 is a popular, modestedly-priced scale. It can measure up to 300g with a realtime digital display and has an accuracy of +/- 0.1g. I prefer to use it when its precision of 0.1g will not significantly affect the formula or when measuring quantities over 10.0g. The V-333 is available for around $140 from PF (another model, the V-200, is around $129 from Artcraft).
When either greater precision is required or when I need to prepare less than one litre of chemistry, I use a conventional “prescription balance” that I bought used from a pharmacist friend of mine. It is a Class-A torsion balance made by the Torsion Balance Co. of Clifton, N.J., and is their model DRX-2.
It has a capacity of 120 grams, and an accuracy of +/- 0.001g with legends marked in 0.005g increments. Back in 1995 these units sold brand-new for around $1,100 without weights, although you can buy them used in good condition for $200 to $500. A weight set for this type of balance can run from $20 to $150.
You will also need to purchase “powder papers.” These are made of vegetable parchment and range from 2″x3″ to 4.5″x6.5″. They are sold in boxes of 1,000 sheets for $12 to $20. They are used to protect the balance’s weighing pan and to eliminate contamination from trace amounts of the previous chemical weighed on the scale. They are used once and then discarded.
You may also wish to order some stainless-steel “balance spoons.” These are used for conveniently removing the chemicals from their bottles and placing them on the scales, especially for precision measurement when you must tap the chemicals onto the weighing pan a few grains at a time.
You should also purchase a small mortar & pestle for grinding some chemicals (such as some brands of Potassium Bromide) into small sizes for precision weighing.
The powder papers, balance spoons and mortar & pestle can be ordered through your local chemical supply house or friendly pharmacy. You can also order them from Apothecary Products, Inc. Their phone number is (800) 328-2742.
I recommend that you store the CD-3 and CD-4 in tightly-sealed brown -glass-jars, to maximize their storage lifespan.
Finally, you should store the acids and alkali in separate cabinets.
DO NOT STORE ACIDS AND HYDROXIDES NEXT TO EACH OTHER IN AN ENCLOSED CABINET!!
RA-4 Color Print Formula
The developer for this formula was first published by Dr. Robert Chapman in PT, and was supplied to me by Ron Speirs and Bill Cox (thank you both). I have slightly modified it to include the optical brightening agent, Tinopal SFP, and optionally Potassium Hydroxide for using it at room temperature.
Please note that because of the necessarily limited amount of Sulfite, the RA-4 developer does not have a long shelf life. I have used it up to 48 hours after mixed, but I wouldn’t go much longer than that.
While this developer is intended for use at 95F, it can be used at room temperature if you either extend the development time to around three minutes, or add around 5.0g of Potassium Hydroxide. For those wanting an “AT” kit, you will have to experiment to find a time suitable for yourself.
Since my preference is for one-shot processing, I’m still experimenting with this developer to see how dilute I can make it and still obtain good results, with the objective of making it as inexpensive to use as possible.
The Blix I reverse-engineered from a Beseler RA-4AT kit, and then diluted it down for economical one-shot processing, requiring 60ml per 8×10. If you wish to use this Blix formula for tray processing, you will likely have to concentrate it. Also, please note that the original Beseler kit included Ammonia in its Blix to counteract the cyan leukocyte staining that could result from stop bath carryover acidifying the Blix. Rather than complicate the formula by adding unnecessary chemicals, I have instead omitted the Ammonia in favor of adding a rinse between the stop and the blix.
|
RA-4 Developer |
|
| Water (Room Temp) | 750.0ml |
| Triethanolamine | 6.0ml |
| Sodium Sulfite, Anh. | 1.0g |
| CD-3 | 5.0g |
| Potassium Carbonate | 40.0g |
| Potassium Hydroxide* | 5.0g |
| Sodium Chloride | 0.5g |
| Tinopal SFP** | 0.5g |
| Water to make | 1.0L |
* Only add the Hydroxide if you are planning to use this developer at room temperature with no additional development time. You may also see a color shift towards cyan which you will have to correct for in your filterpack.
** The use of Tinopal SFP is optional in this developer. I recommend you try using the developer first without the brightener to see if you actually need it with the paper of your choosing.
|
RA-4 Stop Bath |
|
| Glacial Acetic Acid | 10.0ml |
| Water to make | 1.0L |
|
RA-4 Blix |
|
| Water (Room Temp) | 750.0ml |
| Ammonium Thiosulfate, 60% | 80.0ml |
| Ferric Ammonium EDTA | 10.0g* |
| Water to make | 1.0L |
* If you are using Artcraft’s 47% Iron EDTA, use 22.0ml for this step.
Preparation Notes
I recommend using the 1.5ml dropper from Photographer’s Formulary for measuring the Triethanolamine, because it is a -very- thick, syrupy liquid.
When measuring out the TEA, you will make four 1.5ml measurements. Between measurements allow the TEA to accumulate in the dropper and then “squirt” it into the graduate so that all of the measured liquid is correctly put into solution. After the four measurements are taken, rinse the dropper out (both inside and outside) in the graduate so that all of the TEA is put into the solution.
N.B.: TEA is a strong alkali that can cause chemical burns on your skin!
Handle it with due care to avoid getting it on your skin.
In the RA-4 developer the Sodium Sulfite acts to inhibit excessive dye formation and the Sodium Chloride is the restrainer. Since small quantities are involved, you may have trouble attaining consistency from one batch of developer to another if you use an Acculab scale to directly measure these, since its accuracy is only +/- 0.1g and that can (in this case) introduce a variance of 10% or more. If you don’t have access to a torsion balance to weigh the sulfite and chloride and you are experiencing batch-to-batch changes in the developer’s performance, you may instead wish to prepare percentage solutions as follows:
Sulfite Solution
| Sodium Sulfite, Anh. | 10.0g |
| Water to make | 500.0ml |
Chloride Solution
| Sodium Chloride | 10.0g |
| Water to make | 500.0ml |
Substitute 50.0ml of the Sulfite solution and 25.0ml of the Chloride solution for their dry chemical counterparts in the developer formula.
The Blix will not be as opaque as you normally see from commercial kits. This is due to its having been diluted down for one-shot processing.
|
Processing Schedule (at 95F/35C) |
|
| Pre-rinse | 0:30 |
| Developer | 1:00* |
| Stop Bath | 0:30 |
| Rinse | 0:30 |
| Blix | 2:00 |
| Rinse | 2:00 (4x 0:30) |
* The development time may need to be adjusted on a per-paper basis to obtain an ideal D-max. For example, one minute is sufficient for Fuji Super FA5 “G” surface, while 1:10 is better for Fuji Super FA5 “L” surface.
C-41 Color Film Formula
Here’s the C-41 Formula. It was published by Zone V (not to be confused with Fred Picker’s Zone VI), and supplied to me by Ron Speirs (thanks, Ron).
IMO, it is somewhat “hotter” than commercially packaged C-41 developers, and as such may be an ideal candidate for pushing color neg film, especially at temperatures greater than 100F (although any variance from 100F is -not-recommended and should be experimentally proven out before applying to important work).
Sulfite in CD-3 developers is used to prevent excessive dye formation, and I’ve seen the same phenomena occur with CD-4, so it may be possible to use this developer to push color neg film and at the same time slighly increase the Sulfite content to prevent the highlights from getting blocked up (which this developer will quite easily do). In this regard, adding additional Sulfite could be likened to the effect of using an extreme compensating Catechol developer on B&W film – you get fully developed shadows without blocked-up highlights. This is still theoretical, and sometime I hope to have the time to sweat the details out with a 100-foot roll of film, a Macbeth Colorbrator, and my transmission densitometer.
Films that are shot in bright sunshine may have to get pulled slightly to keep their highlights from blocking up. This is something you will have to experiment with, in order to find the ideal exposure index and development time for shooting your film under bright sunshine.
When used to develop film that has been nominally over-exposed by 1/3-stop from the manufacturer’s rated speed, the colors are vibrantly saturated with full contrast.
I’ve not gotten around yet to experimentally diluting this formula, to see how far I can stretch the chemicals and still get excellent results with one-shot processing. I will be doing that sometime later this fall and will report the results back to the ng at that time.
|
C-41 Developer |
|
| Water (Room Temp) | 800.0ml |
| Potassium Carbonate | 32.0g |
| Sodium Sulfite | 3.5g |
| Potassium Bromide | 1.5g |
| Hydroxylamine Sulfate | 2.0g |
| CD-4 | 5.0g |
| Water to make | 1.0L |
|
C-41 Stop Bath |
|
| Glacial Acetic Acid | 10.0ml |
| Water to make | 1.0L |
|
C-41 Blix |
|
| Water (Room Temp) | 500.0ml |
| Ammonium Thiosulfate, 60% | 200.0ml |
| Ferric Ammonium EDTA | 25.0g* |
| Sodium Sulfite | 15.0g |
| Potassium Iodide | 1.0g |
| Acetic Acid, 28% | 10.0ml |
| Water to make | 1.0L |
* If you are using Artcraft’s 47% Iron EDTA, use 54.0ml for this step.
|
C-41 Stabilizer |
|
| Water (Room Temp) | 800.0ml |
| Formaldehyde, 37% | 3.0ml |
| Photoflo 200 | 0.8ml |
| Water to make | 1.0L |
|
Processing Schedule (at 100F/38C) |
|
| Dry Warmup | 5:00* |
| Developer | 3:15 |
| Stop Bath | 0:45 |
| Rinse | 0:30 |
| Blix | 6:30 |
| Wash | 4:00 (8x 0:30) |
| Stabilizer | 1:00 |
* For the “Dry Warmup,” put the tank containing the film into a tempering bath, and allow it to warm up for five minutes before commencing with the development. Please note that you do NOT put tempering water into the tank, as this will induce color shifts.
Preparation Notes
NOTA BENE: Hydroxylamine Sulfate is a corrosive, hazardous substance! It will cause chemicals burns and can stain when alkaline. Be careful not to get any on your skin. Read the MSDS carefully for handling instructions.
Alternate Bleach & Fixer
If you wish, you can also use a separate, more economical Ferricyanide Bleach and Fixer. They cannot be used together as a Blix, since Ferricyanide and Thiosulfate are unstable together and neutralize one another.
|
Ron’s Bleach formula |
|
| Water | 750.0ml |
| Potassium Ferricyanide | 80.0g |
| Potassium Bromide | 20.0g |
| Water to make | 1.0L |
|
The Fixer is made using Kodak Flexicolor Fixer |
|
| Kodak Flexicolor Fixer | 244.0ml |
| Water to make | 1.0L |
If you wish to compound your own fixer from bulk, Dr. Robert Chapman published the following formula:
|
Dr. Robert Chapman fixer formula |
|
| Water | 750.0ml |
| Ammonium Thiosulfate, 60% | 160.0ml |
| EDTA | 1.0g |
| Sodium Bisulfite | 12.0g |
| Sodium Hydroxide | 2.5g |
| Water to make | 1.0L |
|
The process schedule becomes: |
|
| Developer/Stop | <see above> |
| Rinse | 1:00 (2x 0:30) |
| Bleach | 2:30 |
| Rinse | 1:00 (2x 0:30) |
| Fixer | 2:30 |
| Wash | 4:00 (8x 0:30) |
The Bleach and Fixer can be reused until the the bleach/fixer times extends beyond the times listed above.
Bottle Cleaning
In my experience, both C-41 and RA-4 have a tendency to build up a sludge along the sides of the storage bottles. I’ve found the easiest way to clean out this sludge is to put 750ml of hot water into the storage bottle, and then add about 10-15ml of 48% Sulfuric Acid to the water. Tightly screw on the cap and then gently shake the bottle. The acid will quickly dissolve the sludge.
Dump the water and then thoroughly rinse out the bottle before adding fresh solution to it.
N.B.: The Acid will generate heat as it mixes with the water, so don’t use excessively hot water to begin with.
Cost Analysis
Finally, I’m including a gross cost analysis of preparing C-41 and RA-4 from bulk chemicals. Easily, the most expensive chemicals in either process are the dveloping agents (CD-3 and CD-4) and the Ferric Ammonium EDTA.
The difference in price for the Bleach (Iron EDTA) between Artcraft and PF amounts to about two cents per gram, and for the CD-4 it’s about 2.5 cents per gram. At five grams per litre, the cost difference is only $0.13 per litre on who’s CD-4 you use. However, for the Bleach the difference is significant enough IMO that I’ve provided a side-by-side comparison for you to decide whether you want to measure it on a scale or in graduate. 🙂
Not including the cost of the scale(s) or other sundry lab equipment, the chemical-only cost per litre is:
| Formulary | Artcraft | |
| RA-4 Developer | $1.24 | $1.24 |
| Stop Bath | 0.08 | 0.08 |
| Blix | 1.00 | 0.81 |
| RA-4 Total | $2.33 | $2.13 |
| Formulary | Artcraft | |
| C-41 Developer | $1.72 | $1.72 |
| Stop Bath | 0.08 | 0.08 |
| Blix | 2.81 | 2.32 |
| C-41 Total | $4.61 | $4.12 |
At 61ml per 8×10, this will process 16 8x10s for $0.15/$0.13 (PF vs. AC’s Iron EDTA) per 8×10.
Using the Jobo 256x six-reel tank (850ml), the cost per 35mm roll is $0.6531/$0.5837. If you use the Jobo 252x tank and process two rolls at the same time, using 250ml of chemistry (and diluted to 270ml to correctly fill the tank), then one litre will develop eight rolls of 35mm film at a cost of $0.5763/$0.5150 per roll.
For medium-format users, the cost (using a Jobo 252x tank) is $0.70 per roll of 120, and $1.10 per roll of 220.
Large-format (4×5) using 2509N reels varies in cost, from $0.185 per sheet (six sheets in a 252x tank) to $0.229 per sheet (18 sheets in a 2583 tank).
This variance is due to chemistry volume differences in the 252x vs. 2538.
As for the RA-4 cost of $0.15 per 8×10, well, you can compare _that_ for yourself to what your local pro lab would charge you for printing an 8×10.
The cost savings of mixing from bulk versus mixing from a commercial kit diminishes as you buy larger kits, but does not disappear altogether until you buy a 125-litre kit.
Obviously, I cannot place a dollar amount on the value of your own time, so I cannot factor that into the cost analysis and thus that’ll have to be your own call. In preparing these formulas, without pushing myself I find that it takes about 45 minutes to prepare the RA-4 and about an hour to prepare the C-41. These times include all prep work and post-mixing cleanup.
Closing Thoughts
For myself, the principal advantages of mixing color chemistry from bulk chemicals are as follows:
1) Batch-to-batch consistency. When I first started in RA-4, I was dismayed to see how often my filterpacks would vary from one kit to the next. It was simply unpredictable, and in retrospect I believe I was seeing the same thing that Curt Miller saw in dealing with prepackaged PMK – the alkali was being neutralized by CO2 that was permeating the plastic bottle.
By contrast, in the last two weeks I’ve probably gone through about ten litres of RA-4 using the enclosed formula, and there has been _no_ variance whatsoever. No wasted test prints, no readjustments to the trial filterpack, nothing but predictable, satisfying, 8×10 and 16×20 color printing.
2) Long shelf life. The chemicals, in their dry form, will last nearly indefinitely on the shelf. For example, my supply of CD-4 is about 1.5 years old, and this week I used some to make 250ml of C-41 to process a couple rolls of Fuji Reala with excellent, predictable results.
Compare that sort of lifespan to a partially-used RA-4 or C-41 liquid concentrate.
IMO, if you don’t do color work regularly, then this benefit alone could justify the added work of mixing the chemistry from bulk chemicals.
3) Easy ratioing. Since the formulas are metric, it’s easy to divide them to make as much or as little as is needed without any waste.
4) Low cost. The greatly reduced expense makes color film developing and printing _fun_ again, without the angst of seeing another buck or two of chemistry wasted on yet another blown print. This is especially merciful to those who are new to color printing, as it allows them to learn how to successfully print without the grief of going through possibly hundreds of dollars’ worth of kits, or of trying to squeeze the life out of every last drop of developer, and possibly introducing color shifts in the process.
On the negative side, the only disadvantages I could identify is the inconvenience of having to learn how to weigh dry chemicals on a scale, and the initial high investment cost (around US$400). However, in that initial investment you not only buy all the required lab gear, but also enough chemicals to make twenty litres of RA-4 -and- twenty litres of C-41.
You could spend the same amount of money buying twenty one-litre kits of RA-4, and have nothing left over to process your negatives, so the high initial investment is not as bad as it first seems.
Anyway, those are the formulas. Enjoy them, and as I come up with refinements I’ll post them to the ng. If anyone comes up with improvements, please post them as well.
Regards,
Bill Laut
——————————————————————————————————-
Revised 3 Part RA4-Compatible Developer Formula (3/2007) by Steven Keirstead
Downloadable PDF for Printing
This is a revised formula with pH of 10.3 slightly more basic than the Kodak standard of 10.1-10.2 for RA developers. It is made in three relatively stable concentrates that can be made ahead of time. I have noticed adding 10% Ethanol to part B reduces the chances that microorganisms will grow in it and speeds CD3 dissolution. This is similar to Kodak’s RA-4 developer but has different concentrations (to increase developer activity), and does not have an optical brightener. This formula produces best results with Fujicolor Crystal Archive Type P and C with good colors and dynamic range from black to cool white base, and very good results with Kodak Endura Portra, Supra and Ultra papers, with good blacks and a slightly warm white base. I have not tested it on other papers yet. Keep in mind that color balances with this recipe will probably be different than with a commercial formula, I find I need additional Magenta and Yellow filtration compared to Kodak RA Developer.
Most of the chemicals are available from Artcraft Chemicals or ArtChemicals.com. You may be able to buy Etidronic acid, Diethylhydroxylamine and Lithium polystyrene sulfonate from Sigma-Aldrich Chemicals or other suppliers.
This formula is “open source,” so feel free to use or modify it at your own risk.
Developer Part A – for 10 X 1.85 Liter batches:
| 1) Water, Deionized or Distilled |
500mL
|
|
| 2) Triethanolamine | CAS# 102-71-6 |
240mL
|
| 3) Lithium polystyrene sulfonate (30%) | CAS# 9016-91-5 |
17mL
|
| 4) N, N’-Diethylhydroxylamine, 85% Aqueous solution | CAS# 3710-84-7 |
130mL
|
| 5) Etidronic acid, 60% Aqueous solution | CAS# 2809-21-4 |
26mL
|
| 6) Water, Deionized or Distilled |
to 1000mL
|
|
Developer Part B – for 10 X 1.85 Liter batches
| Pre-Mix without CD-3 | ||
| 1) Water, Deionized or Distilled |
250mL
|
|
| 2) Lithium Sulfate | CAS# 10377-48-7 |
50g
|
| 3) Sodium Sulfite | CAS# 7757-83-7 |
2.5g
|
| 4) Ethanol, 100%* | CAS# 64-17-5 |
100mL
|
| 5) Water, Deionized or Distilled |
to 500mL
|
|
|
* If you can’t get pure ethanol, do not use denatured alcohol, which contains chemicals that may adversely effect developer activity. Subtitute Everclear or other 190 proof, 95% alcohol, 105.2mL. Alcohol acts as a preservative and speeds CD-3 dissolution. Shake well before continuing if you see any precipitate.
|
||
| Complete Part B: Add CD-3 when making working batch. | ||
| 1) Water, Deionized or Distilled |
40mL
|
|
| 2) Part B Pre- Mix from Above |
50mL
|
|
| 3) CD-3 Developing Agent | CAS# 25646-71-3 |
10.00g
|
Developer Part C – for 10 X 1.85 Liter batches:
1) Water, Deionized or Distilled, Boiling 2) Sodium Carbonate, Anhydrous
Note: if Sodium Carbonate Monohydrate use: 514gCAS# 497-19-8
439g
3) Sodium Bicarbonate CAS# 144-55-8 4) Sodium chloride (ACS or Technical grade,
Not Iodized)
For substituting Lithium Chloride use 17g dissolved in 100mL pure water.
LiCl will not dissolve in basic solutions! However it will stay in solution if added as liquid solution to this mixture.
Keep LiCl salt dry, tightly capped in a very dry place.CAS# 7647-14-5 (for NaCl) CAS# 7447-41-8 (for LiCl)
23.5g
3) Potassium Bromide (0.7% or 7g/L Solution) CAS# 7758-02-3 5) Water, Deionized or Distilled
Note: Part C may start to grow microorganisms after a few weeks. It helps to disinfect the containers used by treating them with boiling water or microwaving for a few minutes
with a small amount of water inside and a loosely attached cap. You may want to make smaller batched of Part C
For 1.85 Liter of Working Strength Developer, mix:
Water, Deionized or Distilled, 20-25˚C Part A Part B – Complete With CD-3 Part C Water, Deionized or Distilled To scale up, multiply to obtain desired volume of working developer.
Some people use a 2% Acetic acid stop bath between the Developer and Blix to minimize mid-tone staining on Kodak RA4 papers, but I have not found this to be needed in my roller transport machine. So long as the Blix is slightly acidic (it should be pH 6.5-6.3, no lower, according to an expert) I do not get staining. If you have trouble with staining, try Developer in Bath 1, 2% Acetic acid stop bath in Bath 2 and Blix in Bath 3. For tube and tray processing or Nova processors, I would recommend the use of a stop bath.
RA4-Compatible Bleach Fix- for 1.85 Liters of working strength:
This formula is also “open source.” Use or modify it at your own risk.
1) Water, Filtered from a Brita Pitcher or similar, or Distilled or Deionized 2) Ammonium Thiosulfate, 60% Aqueous solution CAS# 7783-18-8 3) Sodium Sulfite CAS# 7757-83-7 4) Sodium Bisulfite CAS# 7681-57-4 or 7631-90-5 5) Ferric Ammonium EDTA, 52% Aqueous solution CAS# 21265-50-9 4) Acetic Acid, Glacial (100%) CAS# 64-19-7 6) Adjust pH to 6.5 – 6.3, if needed (Add Ammonia for Higher pH, Acetic Acid for Lower pH) 7) Water, Filtered from a Brita Pitcher or similar, or Distilled or Deionized
Adjust pH to 6.5-6.3, if needed. This Blix lasts fairly well, and can be replenished with itself. I generally use 25% new + 75% old blix for a day’s printing session of 20-50 8-10″ prints. If you are heavily using, replenish 50% new + 50% old Blix. Be careful to not let the solution get saturated with silver or silver metal flakes will precipitate onto your paper and equipment, and it’s a royal pain to clean up. After 4 to 6 day-sessions of use, I start an all new batch of Blix. I use Blix at 37˚ C, but it should work at lower temps too.

我在 1993 年的新闻组帖子中提供了以下公式,并且我
已经使用了很多年。
CD4 比 CD3 更活跃,因此
对于给定的规定数量的 CD3 ,您只需要大约一半的 CD4 。
与 CD3 类似,您会注意到您需要更多的
碳酸钾和少量的氢氧化钾。
对于RA4纸,如果CD4不足或碱度
太低,则不会得到好的黑色,而是黑色会
呈蓝黑色,因为底部的黄色形成层不会
完全开发。
除非您的
供水中含有过量的氯或其他污染物,否则您不需要为显影剂提供蒸馏水。
RA4 开发人员于 1993 年发布:
亚硫酸钠 [Anhdrus]………………………………..1.5 克
三乙醇胺 ……………………………….. ………………….10ml
氯化钾…………………. ………………….1.5gm
碳酸钾…………………..35gm
CD-4 ………………………………. ………………..2.5gm
水 …………………………….. ………………… 1.0 升
pH 值 10.1-10.3
按照柯达时间 [45 秒] 和温度 [35 摄氏度] 进行处理
[注意 CD-4 是“两点五克”不需要太多,
或者使用 5 克 CD-3]
要获得更好的润湿效果,您可以
在上述显影剂中加入 20 毫升二乙二醇。
你想要组合漂白剂 – 定影剂的配方吗?
祝你好运……..弗兰克韦伯
—–
一位退休的光化学家在 APUG(可能还有其他地方)上发帖说,
在 RA-4 显影剂中使用 CD-4 是不可取的。显然存在图像
稳定性问题;
与使用 CD-3 的显影剂显影的打印件相比,使用这种显影剂显影的打印件可能会更快褪色。(不过,我对此没有
确切的时间框架。)因此,我个人不会
将这个公式用于我想要持续的任何事情。